Complete step-by-step guide to mastering every feature of UpNext DJ Desktop for macOS and Windows
UpNext DJ works seamlessly across devices. Features sync in real-time between your phone and computer:
Your command center for professional features:
For guests to make requests AND for you to manage on the go:
Use the Desktop App at your booth for music matching and export, and keep the iOS App in your pocket to manage the crowd while you interact with guests.
Welcome to UpNext DJ Desktop! This guide will walk you through everything you need to know to run successful DJ events.
The first month free promo code works on ALL subscription tiers - even the Lifetime plan! Try it risk-free.
Your music library is the heart of UpNext DJ Desktop. The app scans your local music files to instantly match guest requests to songs you actually have.
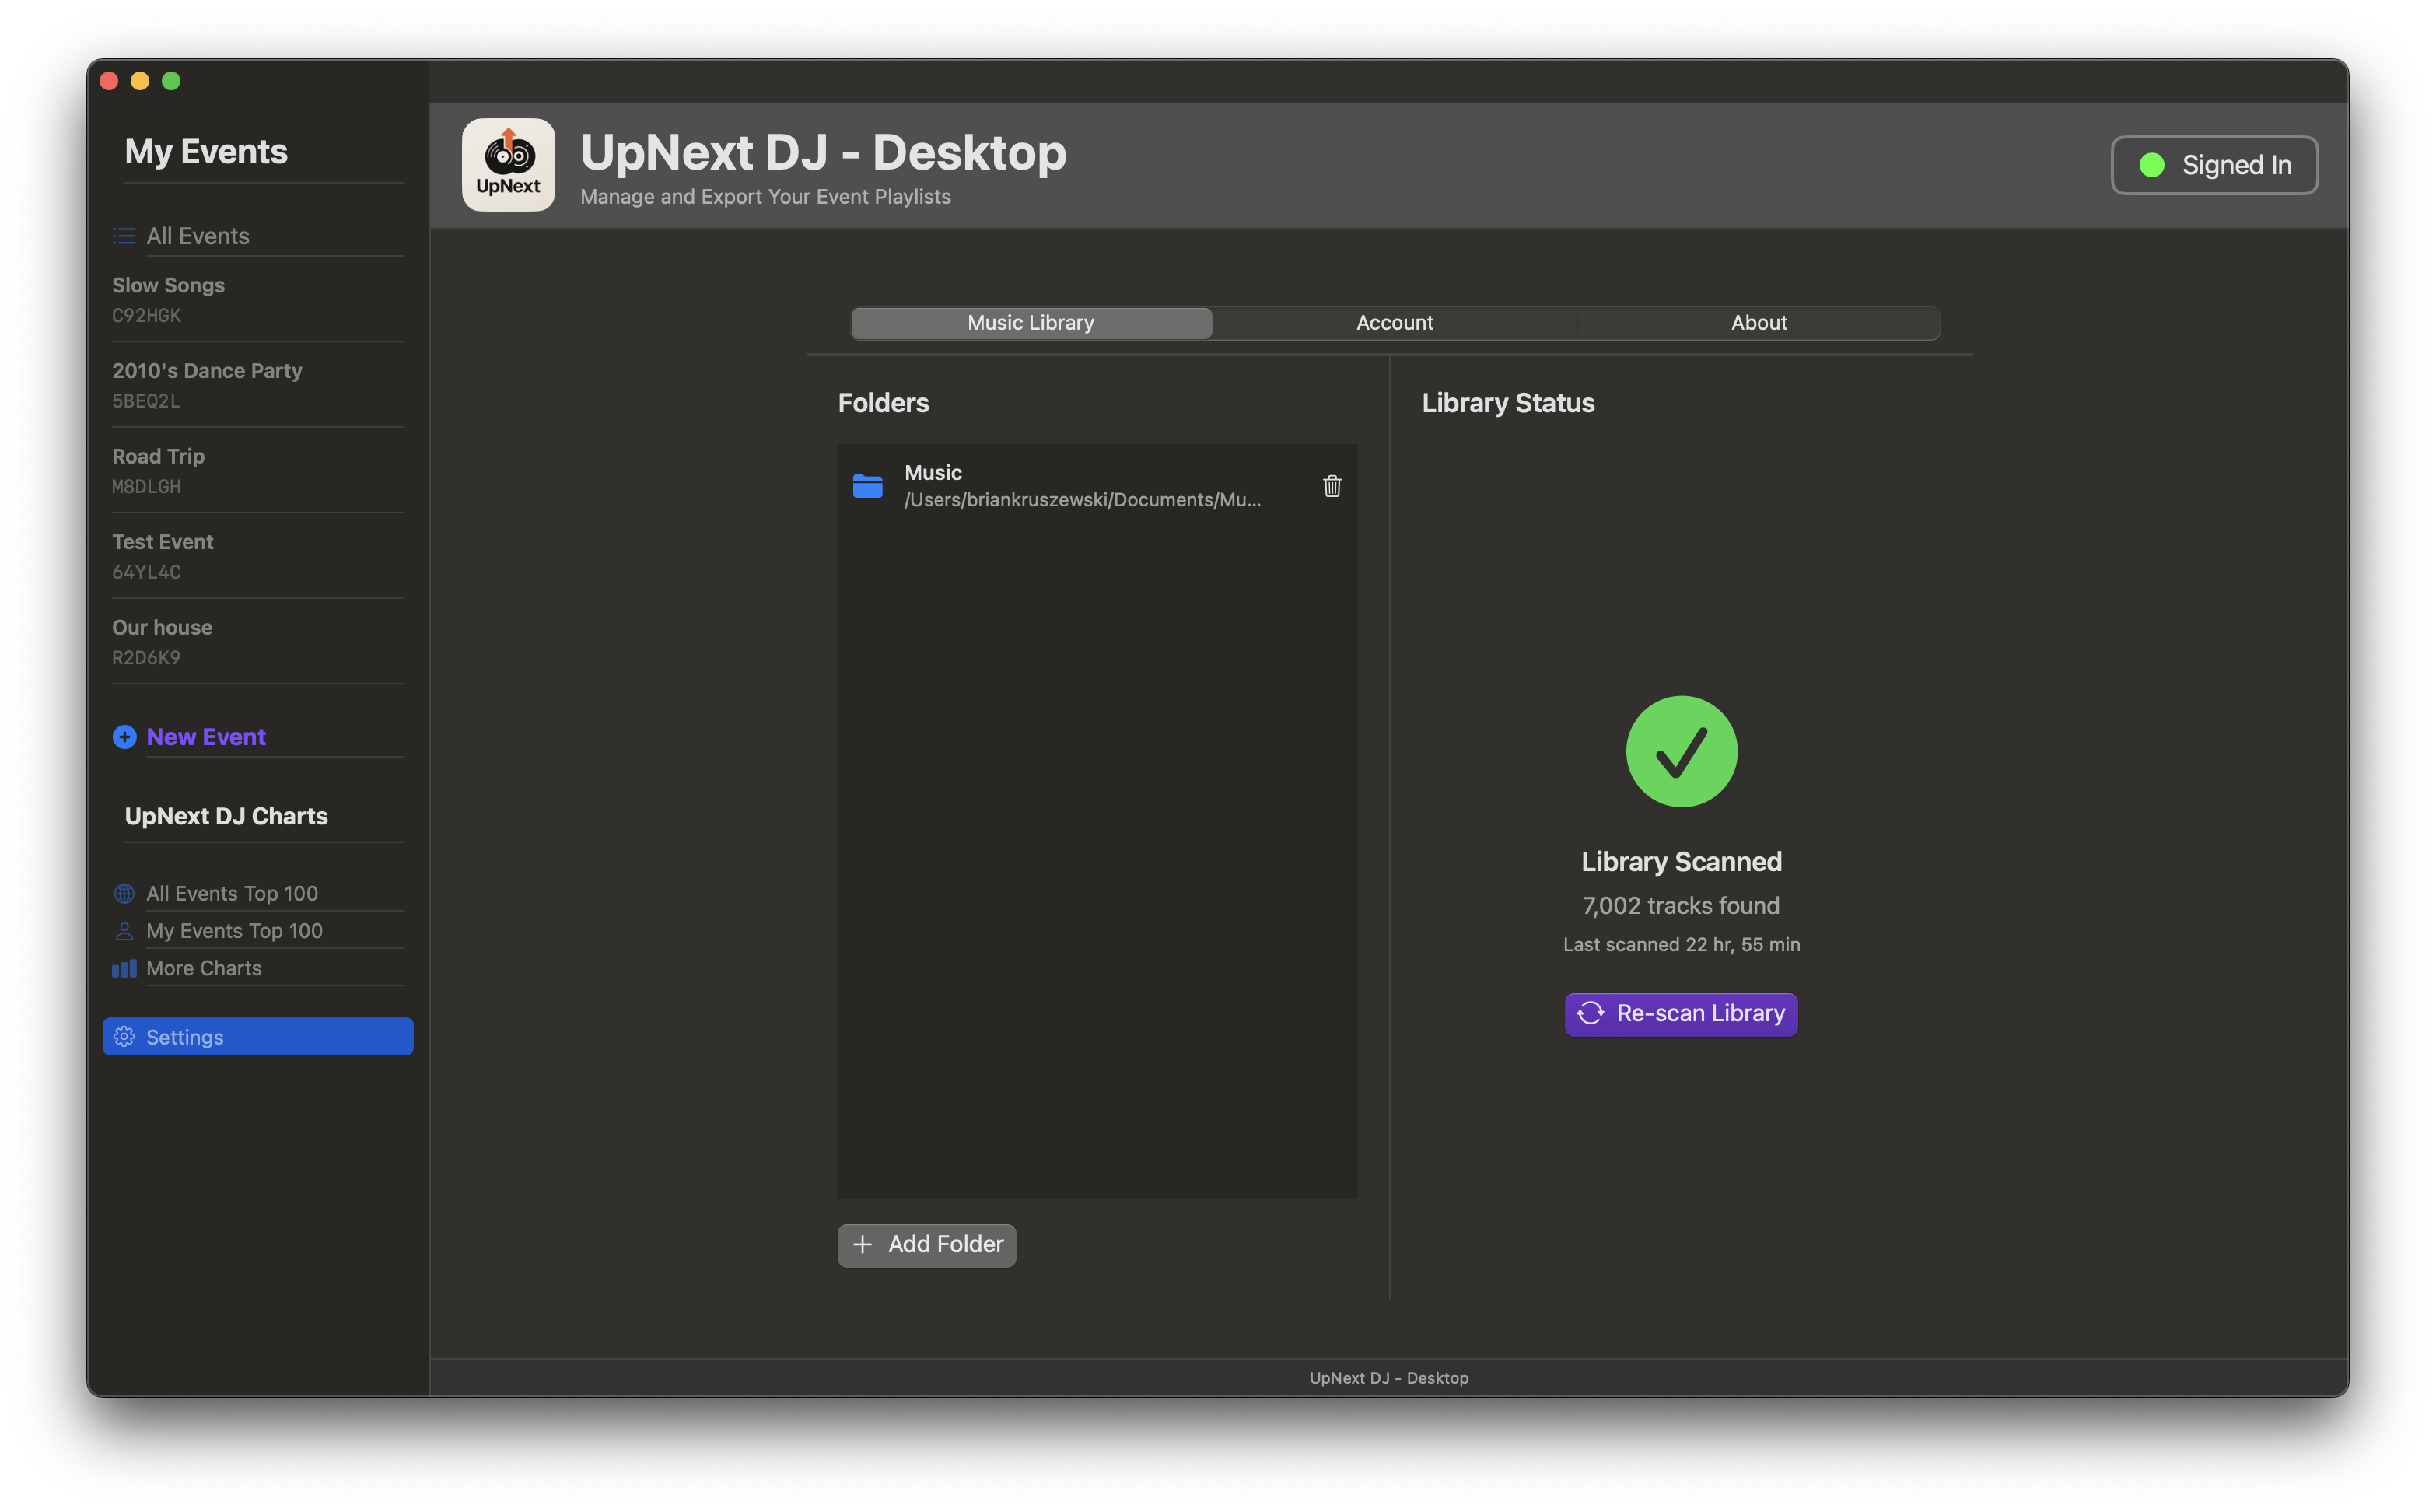
You can add multiple folders from different locations! Perfect if you have music on both internal and external drives.
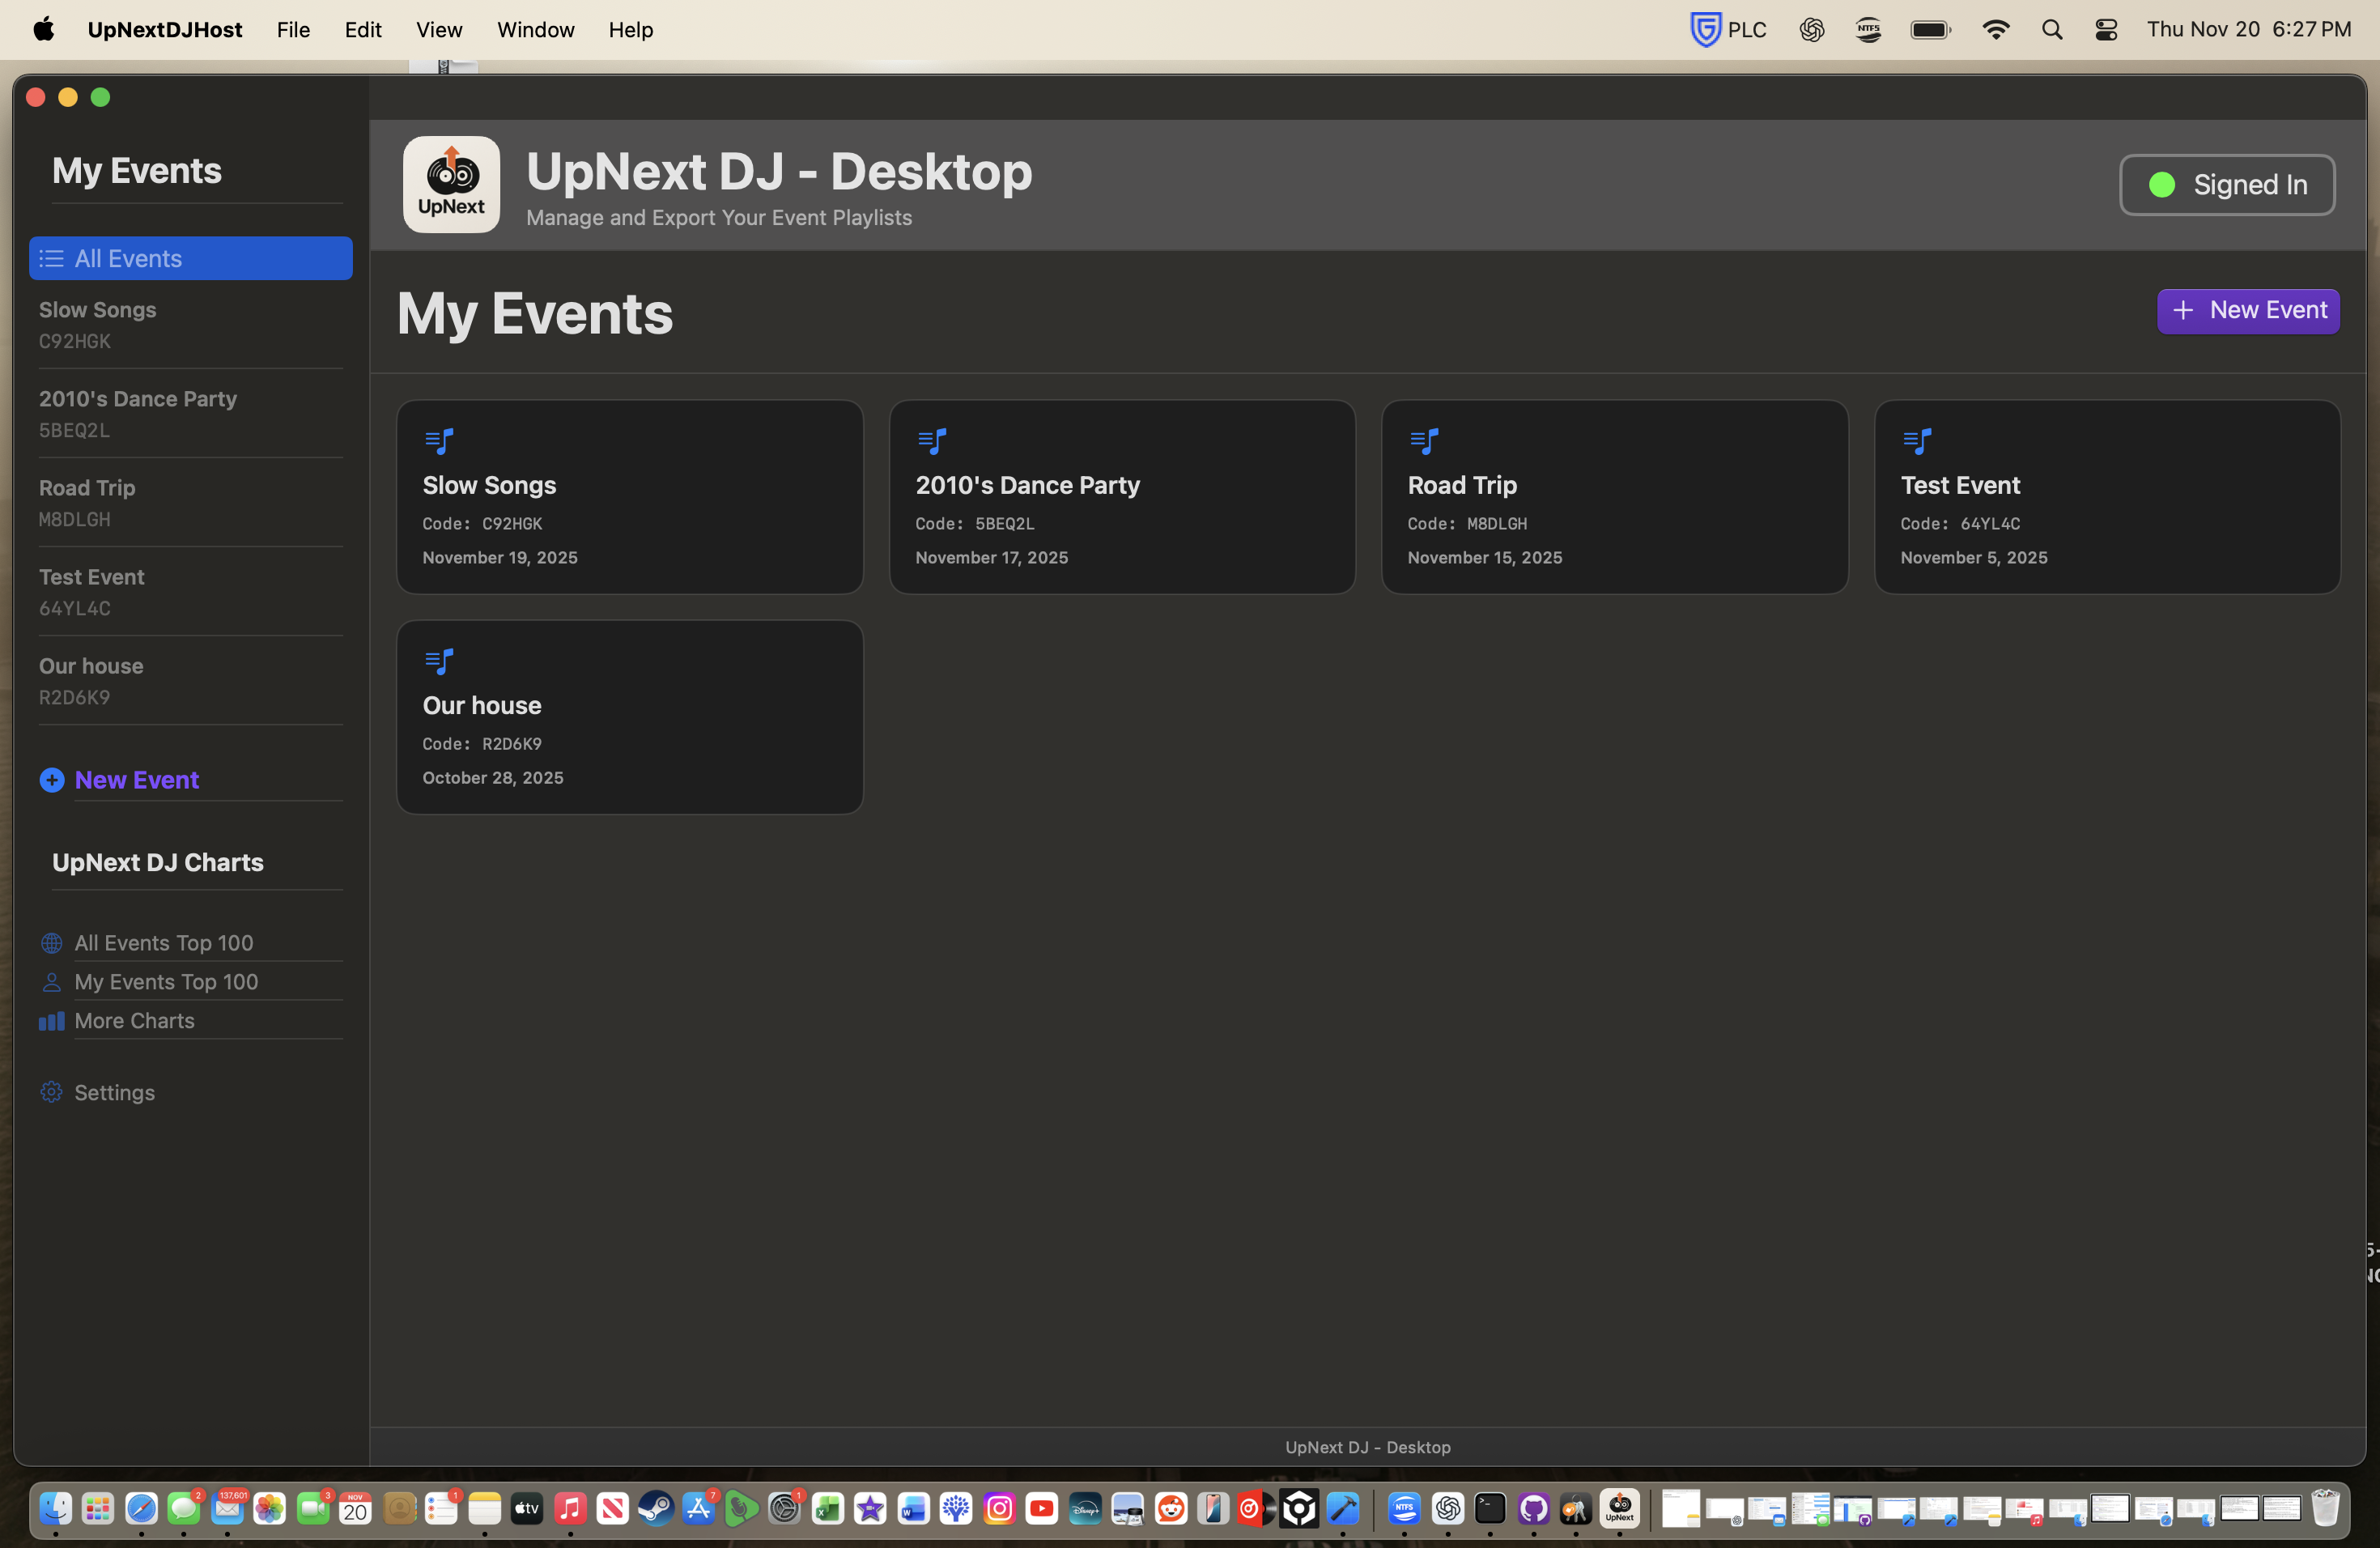
Events are how you organize each gig. Create unlimited events and switch between them instantly.
Monitor all song requests from your guests in real-time. See what your crowd wants to hear!
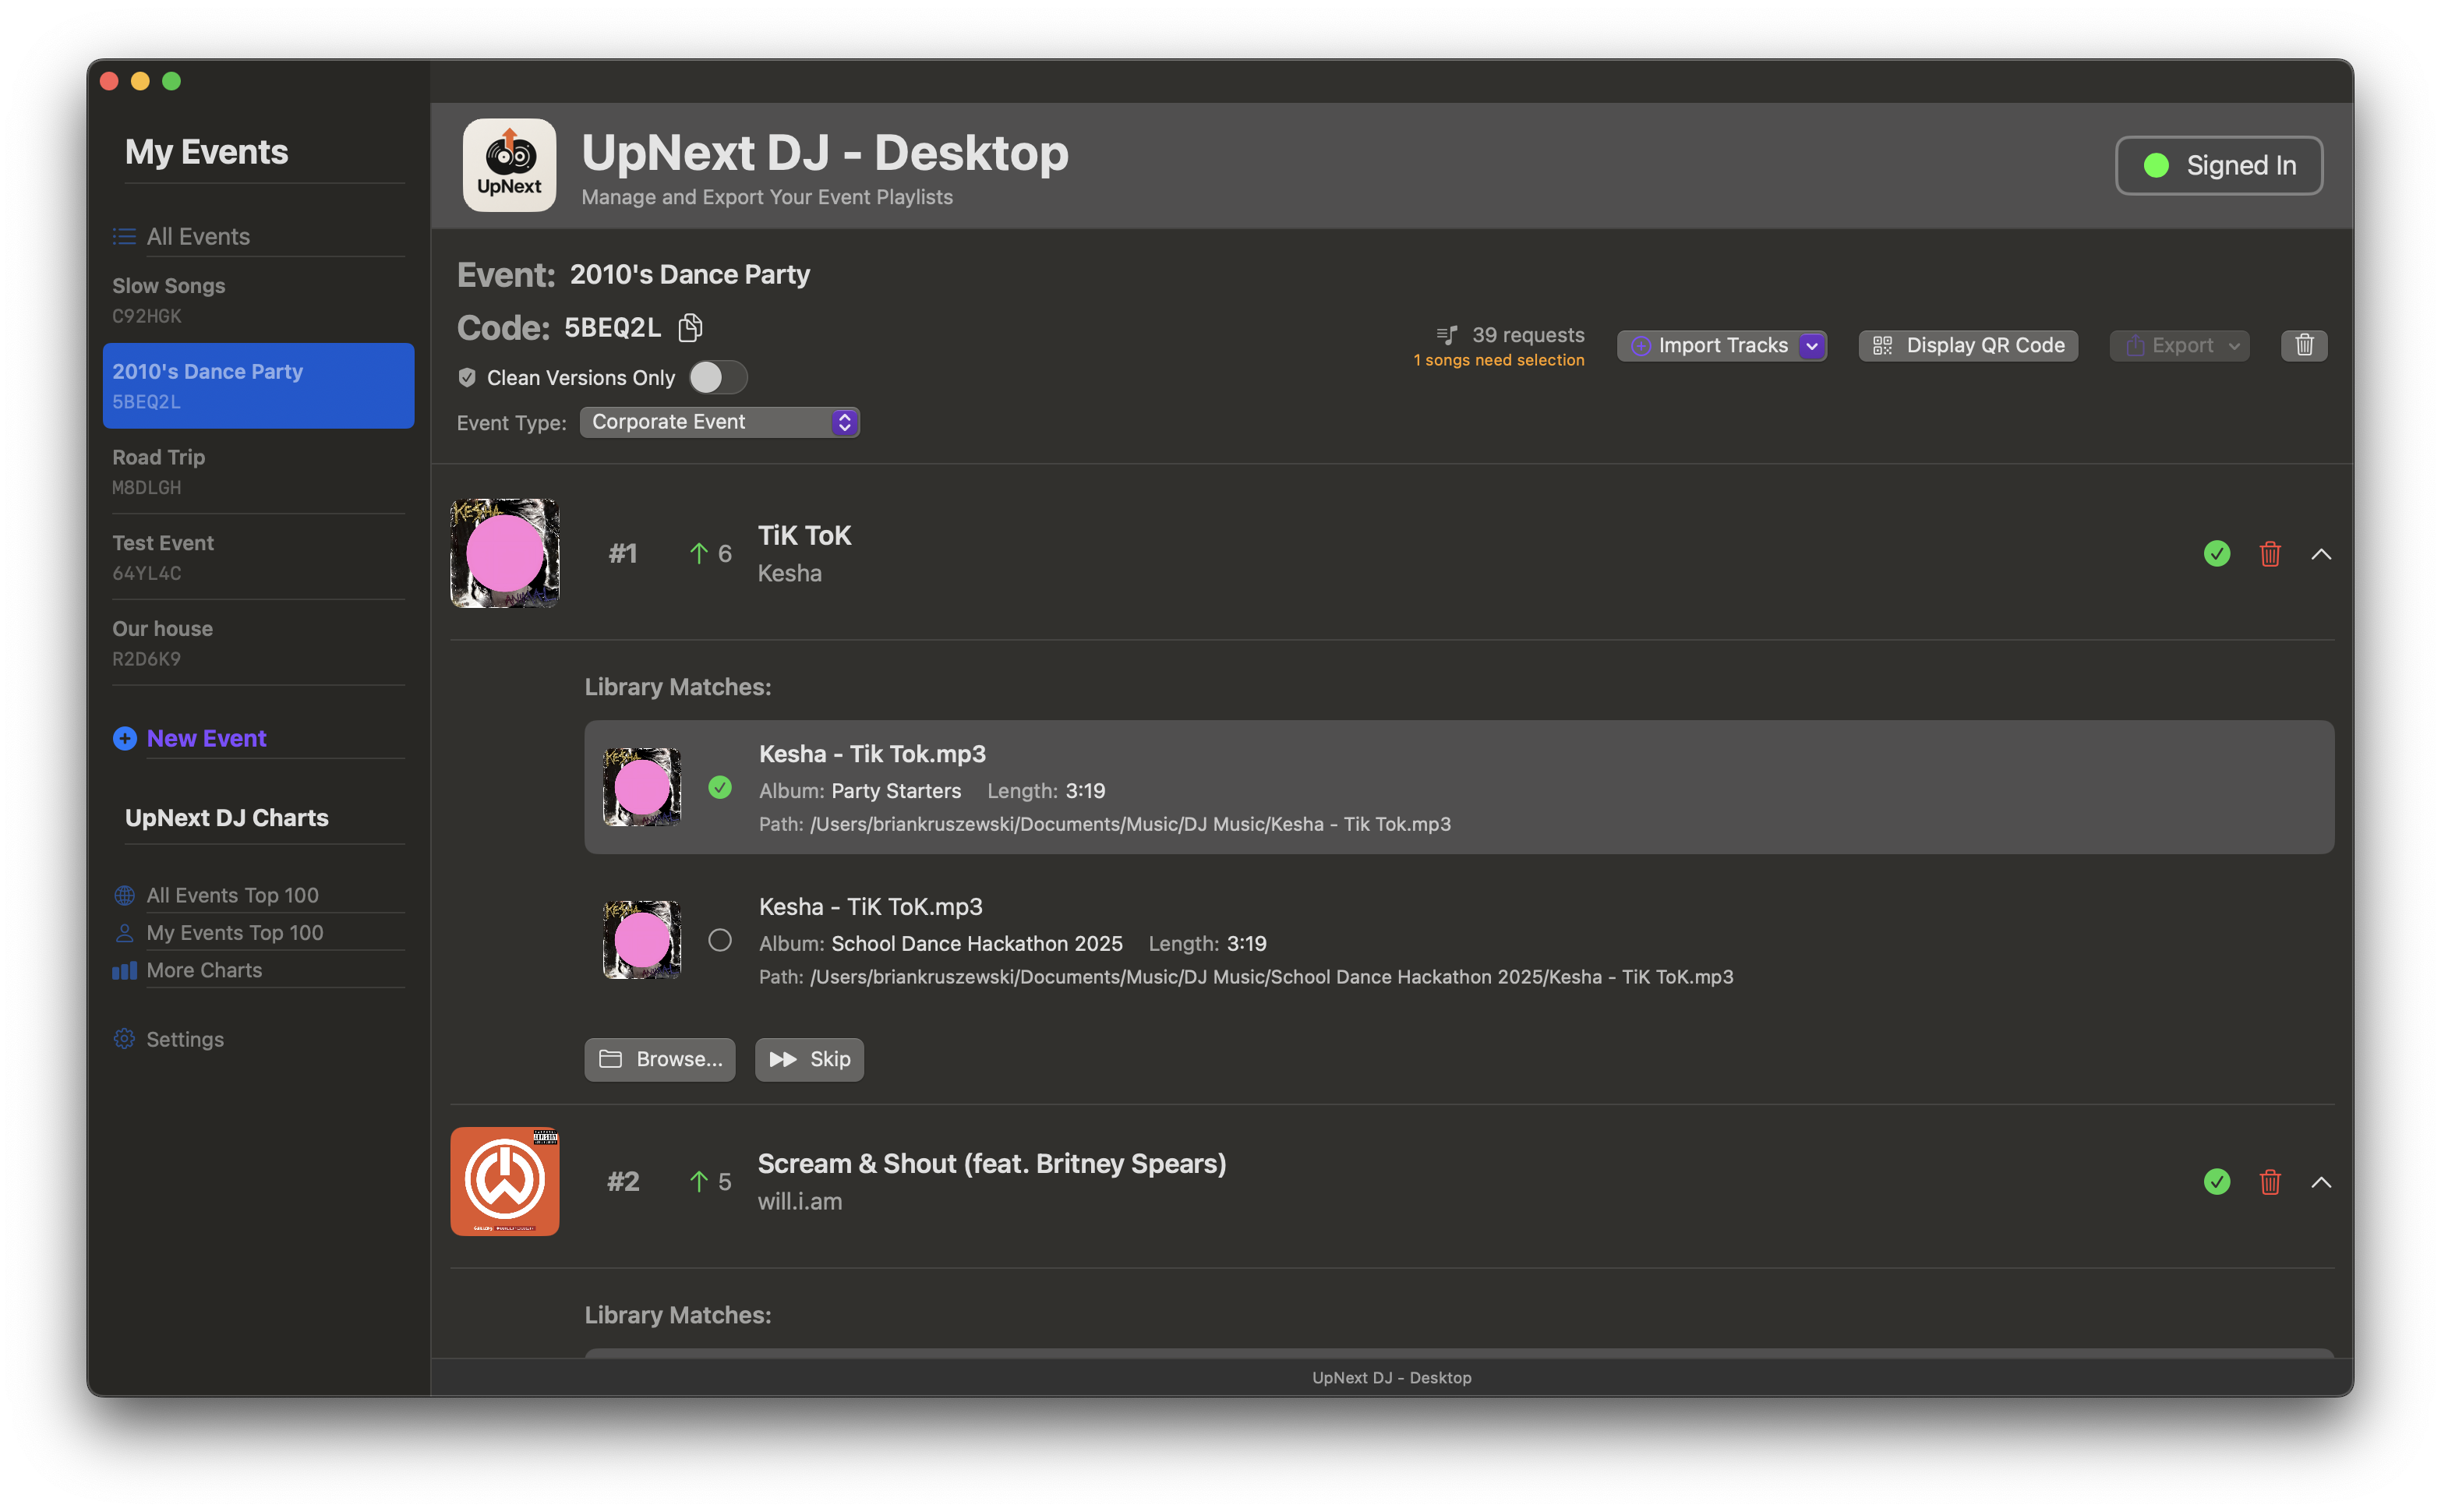
Songs are automatically sorted by vote count. The most popular requests appear at the top, making it easy to see what the crowd wants.
View all requests sorted by popularity. Use this information to decide which songs to play next, keeping the crowd engaged by playing their favorites!
Keep an eye on vote counts! A song with many votes means the crowd really wants to hear it. Prioritize those to keep energy high.
Battle Mode is a high-energy feature that puts the power in your guests' hands. Pick two songs and let the crowd vote LIVE on which one plays next!
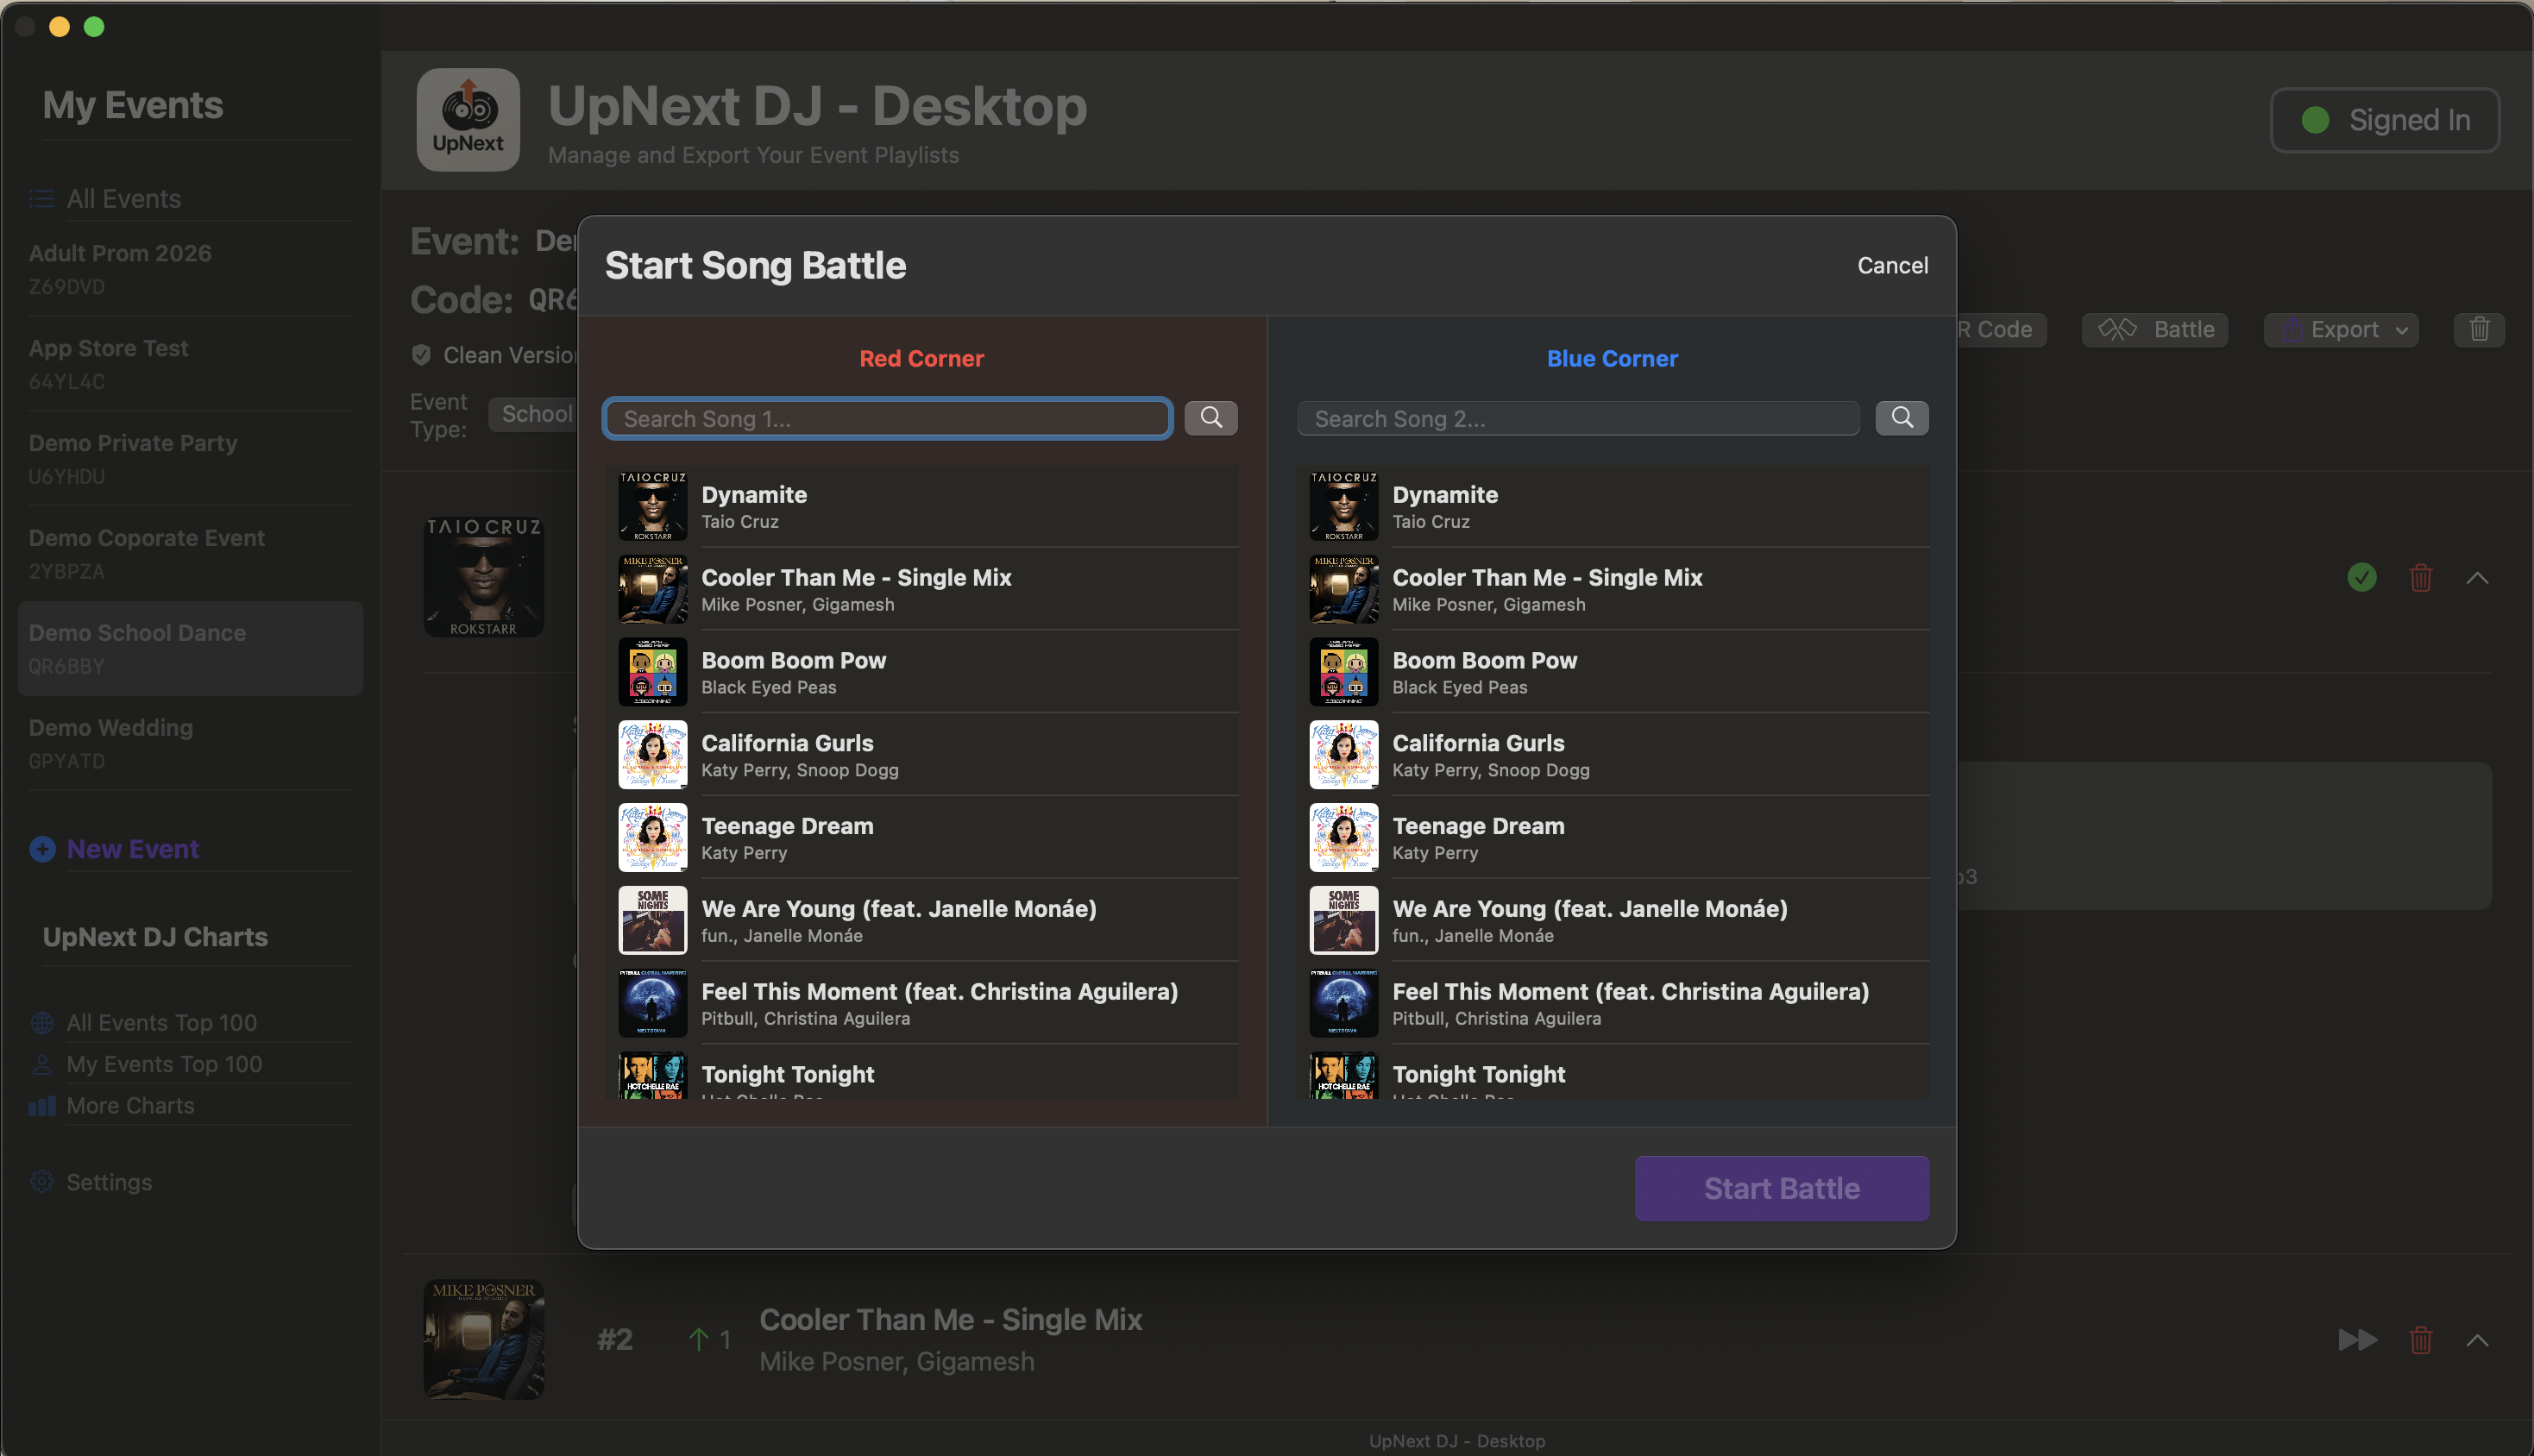
Use the microphone to hype up the battle! "Make some noise! Do you want [Song A] or [Song B]? Vote now!"
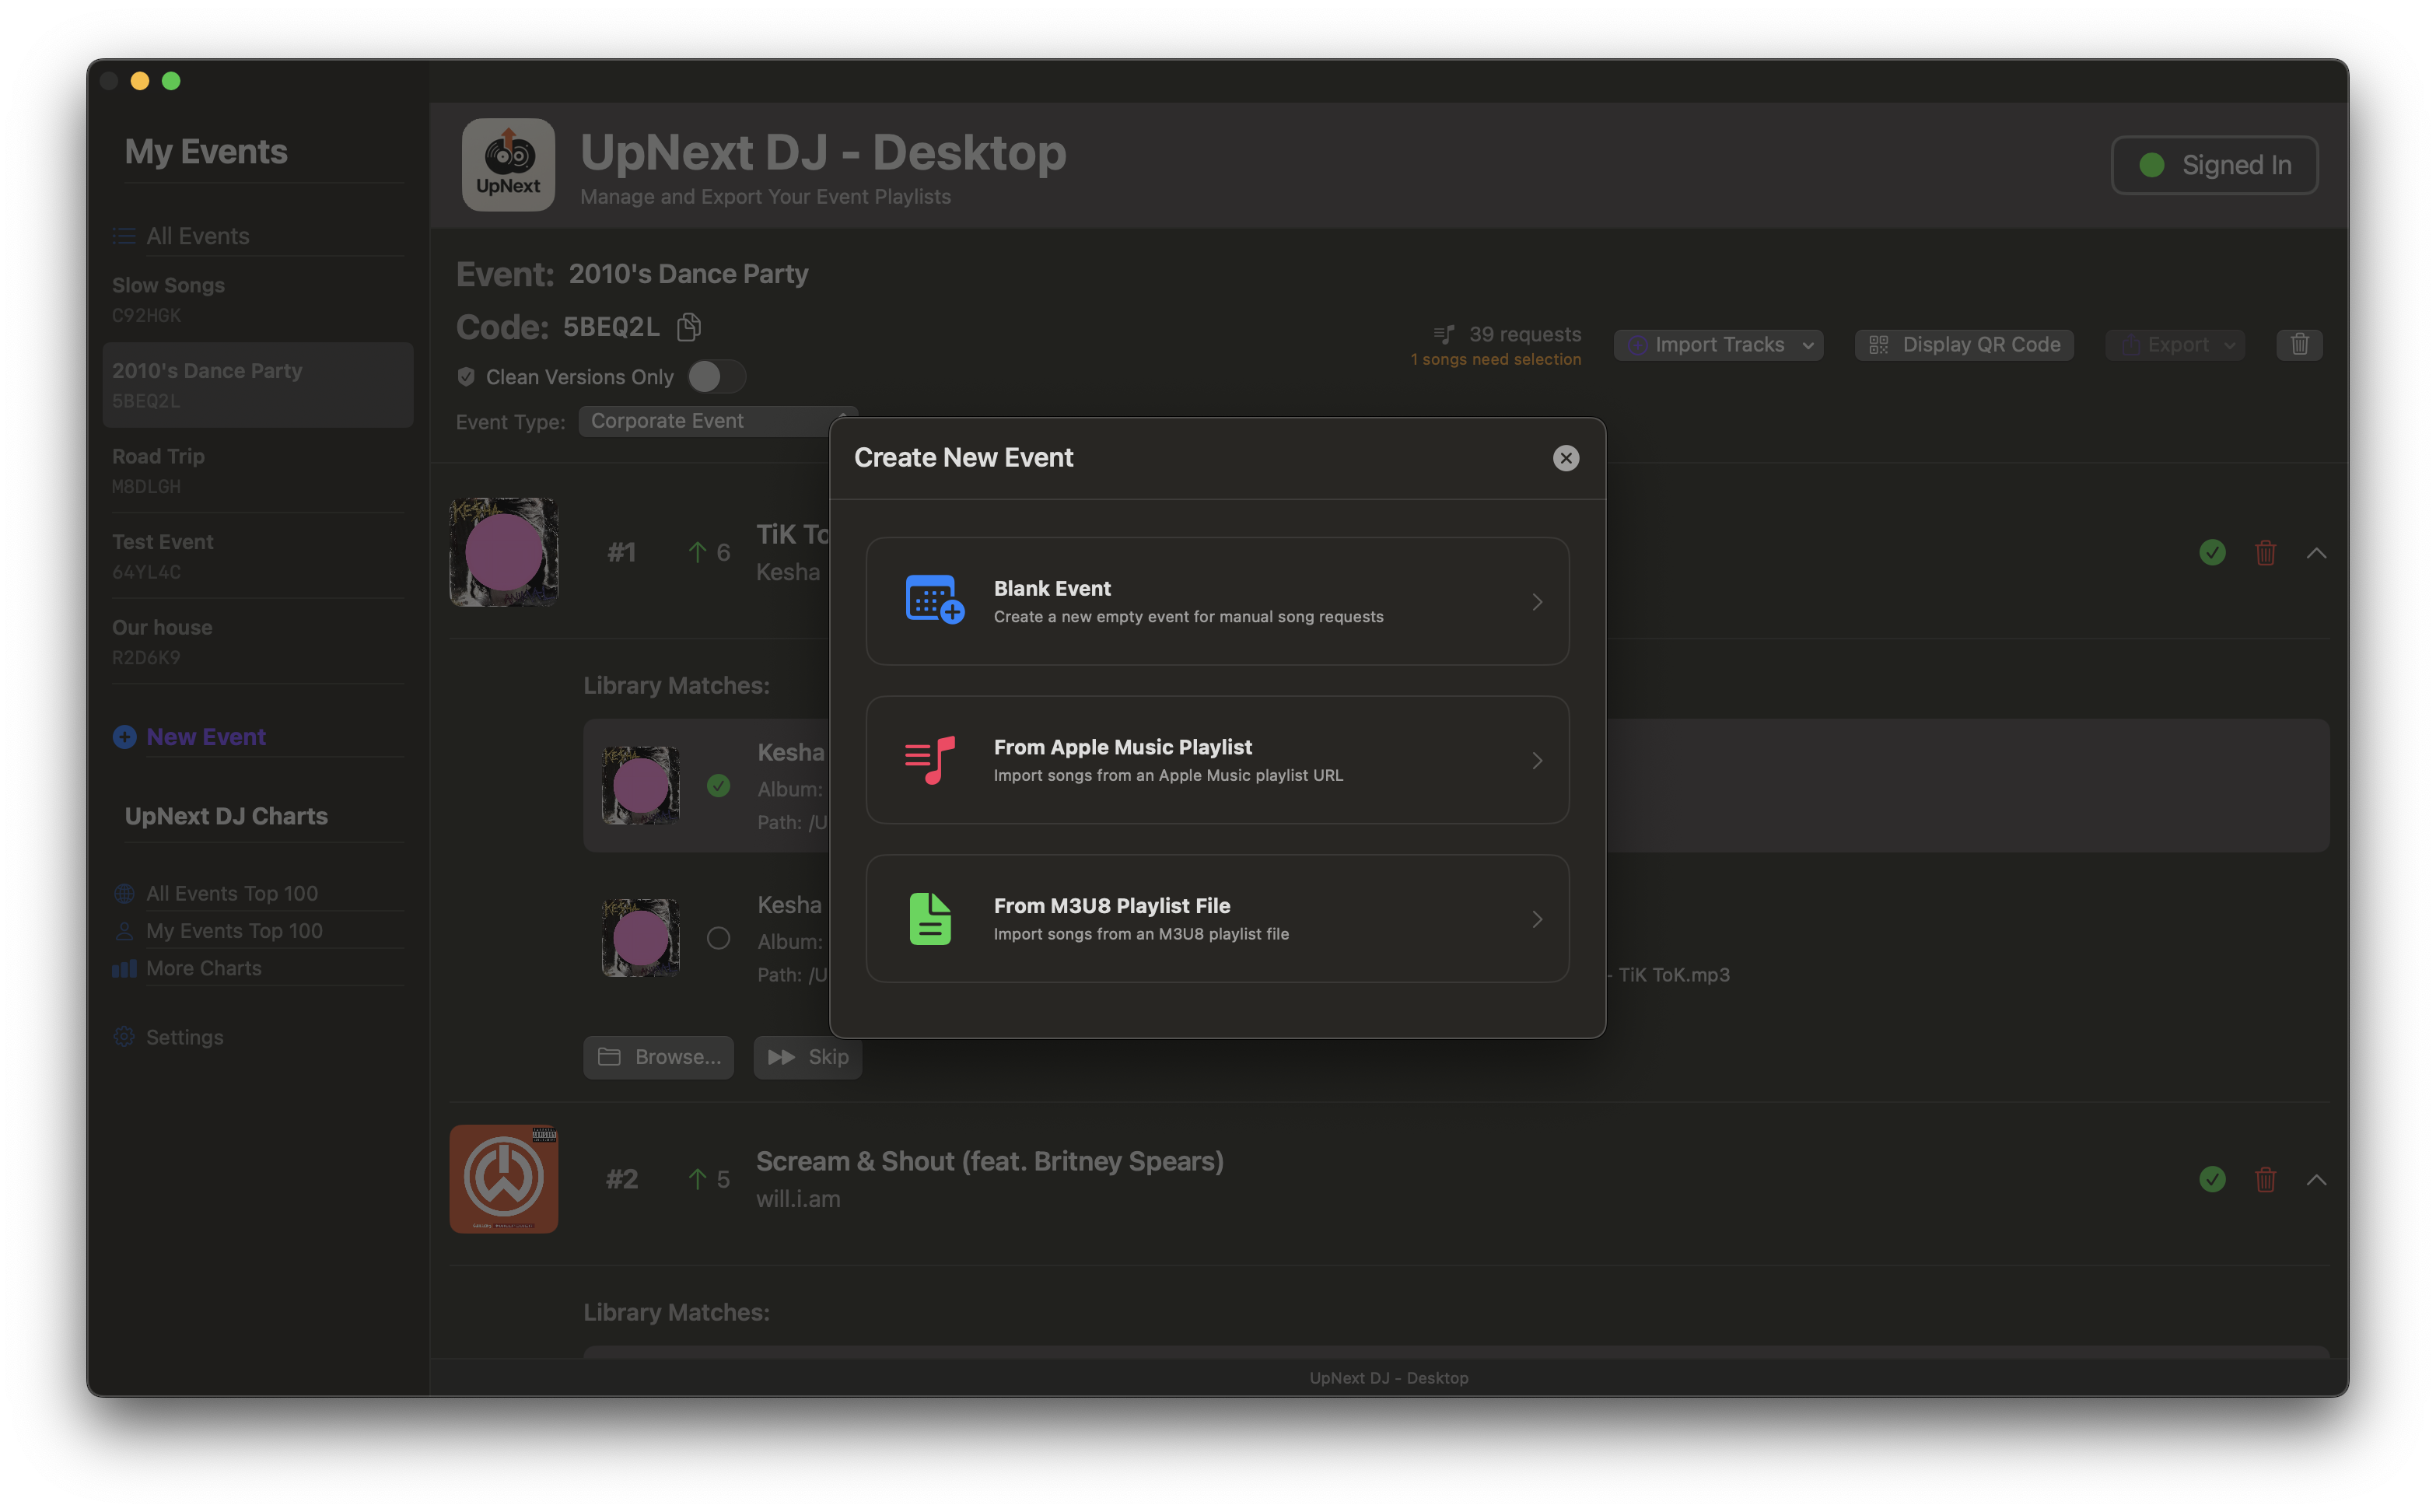
Pre-load your events with playlists! Import from Apple Music, Spotify, M3U8 files, or CSV to start with a curated setlist. You can import into an existing event or create a brand new event directly from a playlist.
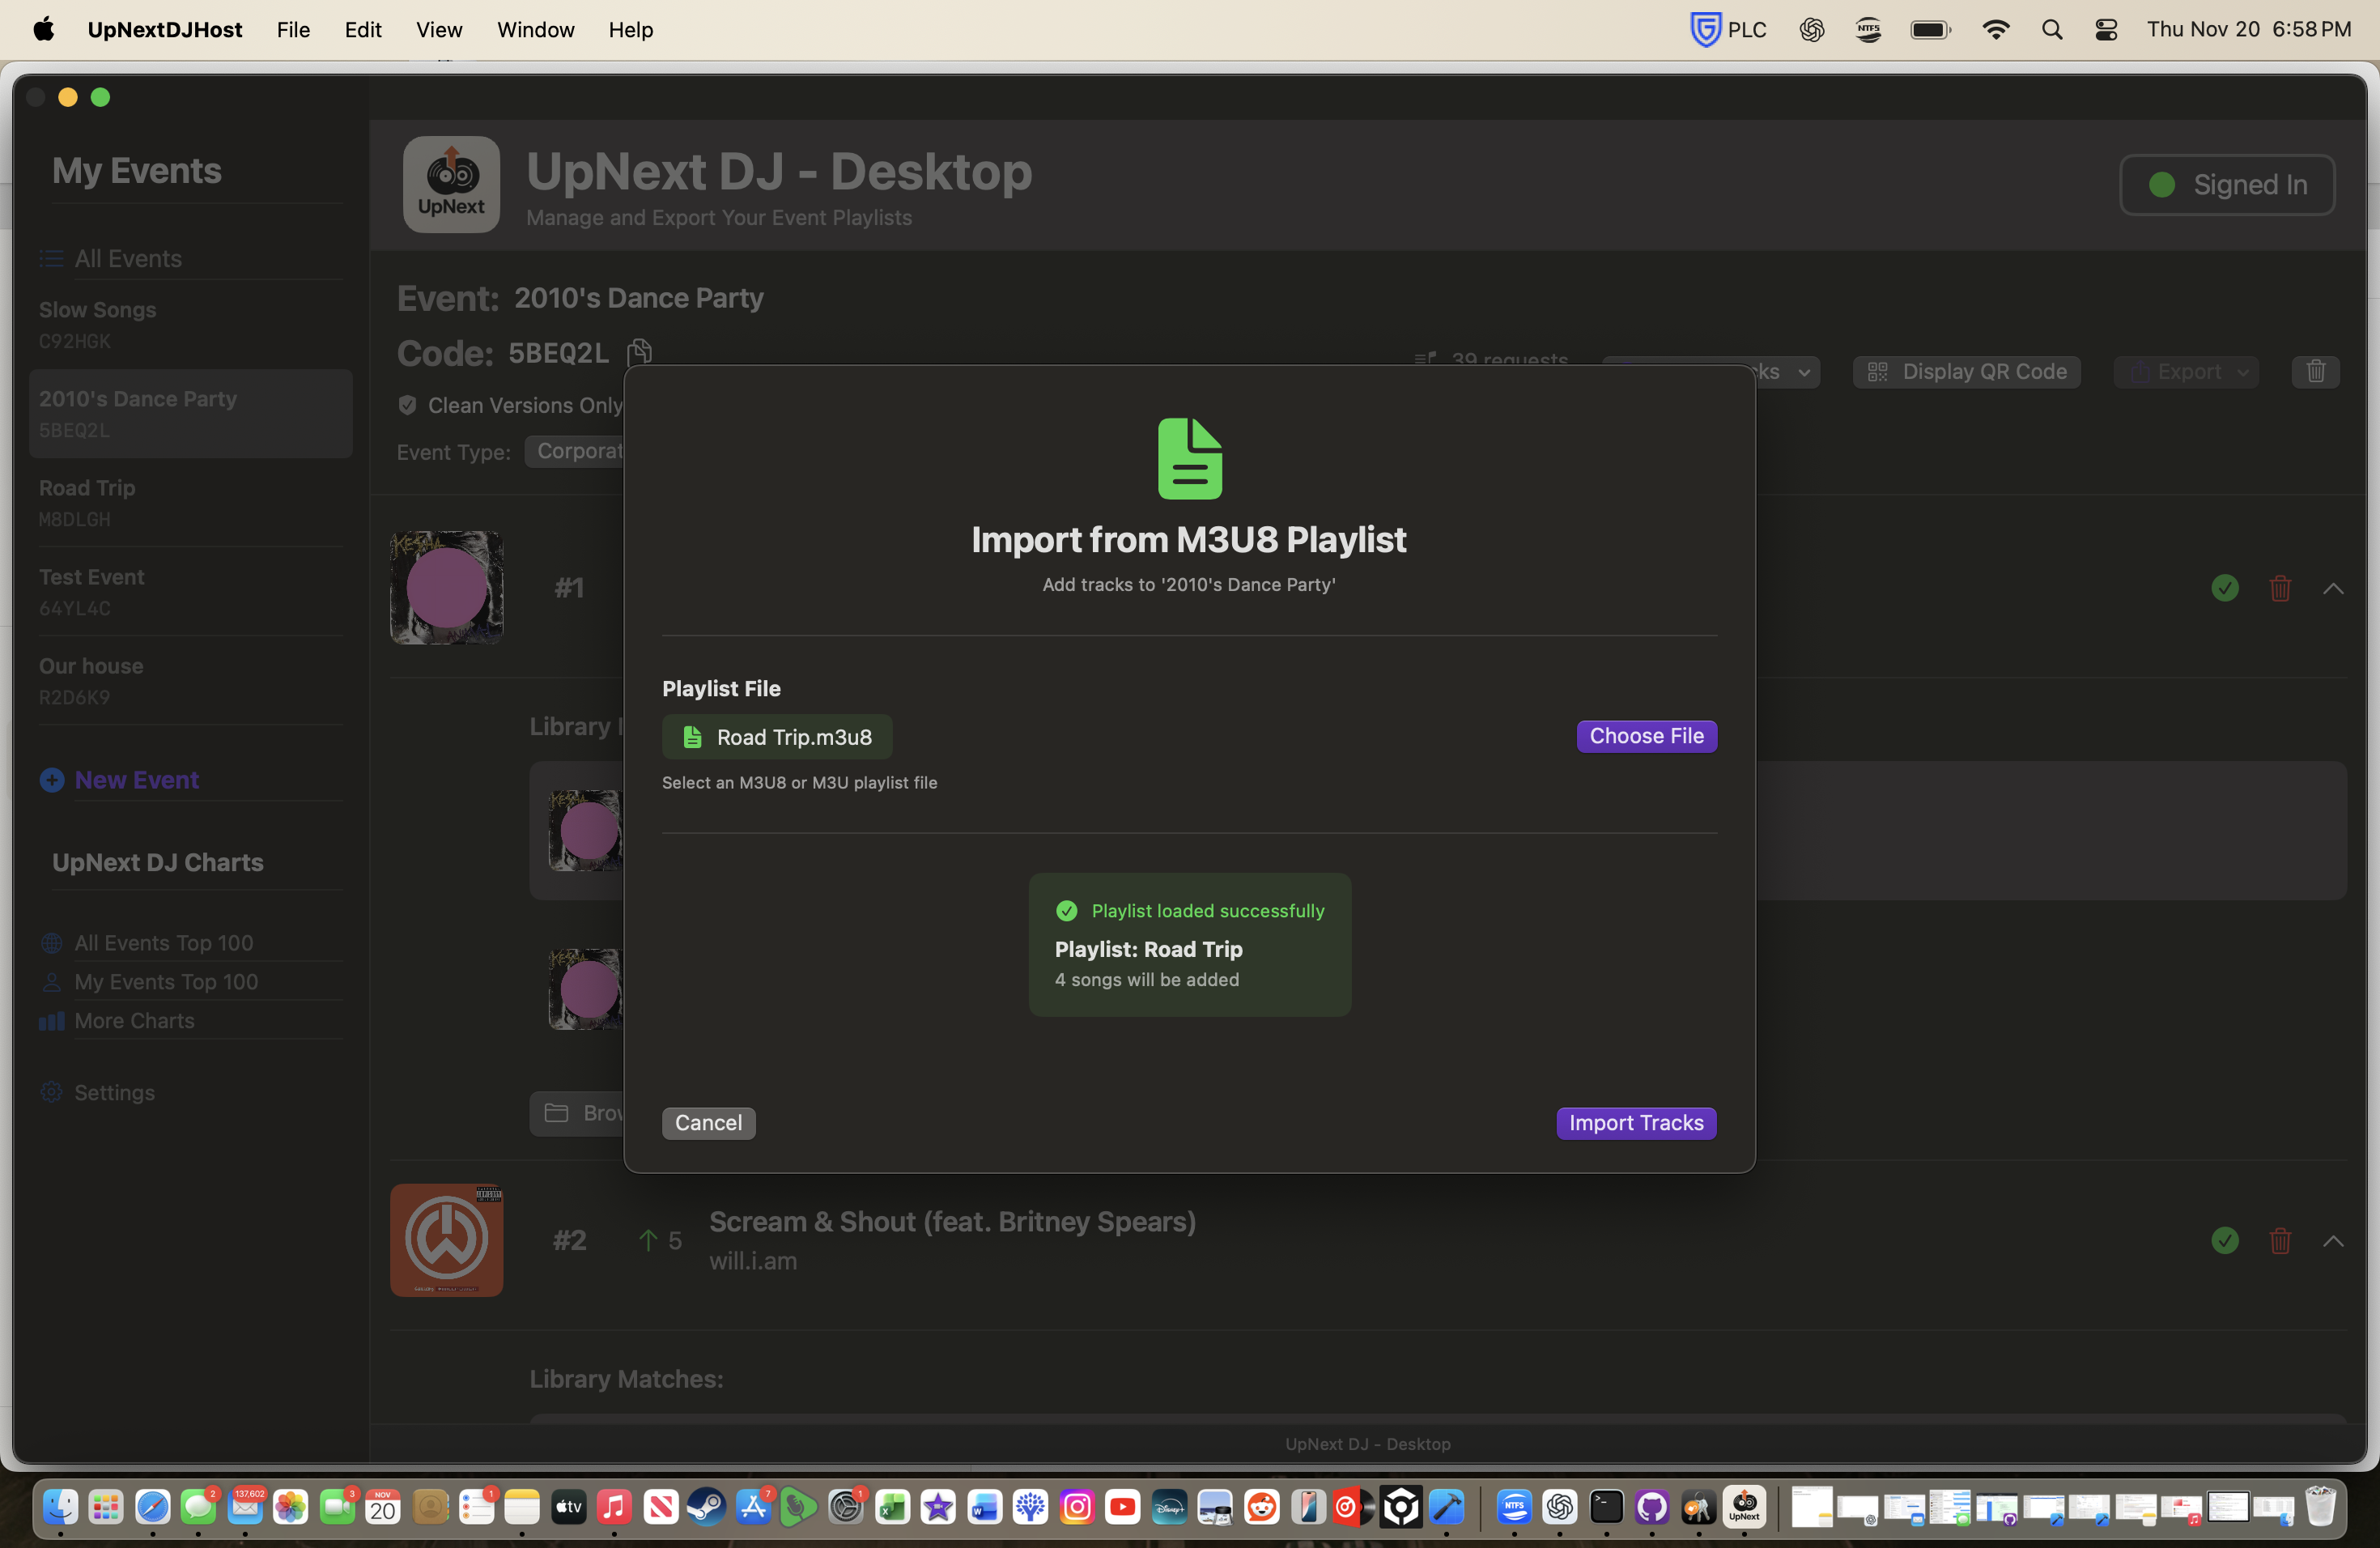
Create event templates by exporting successful events to M3U8, then import them as starting points for future similar gigs!
Tagging your events correctly unlocks powerful analytics and contributes to the UpNext DJ Music Charts.
Always select the correct event type (Wedding, School Dance, Corporate, Private Party) when creating an event. It makes your "My Events Top 100" charts much more useful!
Export your event's song requests to your DJ software. Perfect for record-keeping and playlist building.
Discover the most requested songs across your events or globally. Build data-driven playlists!
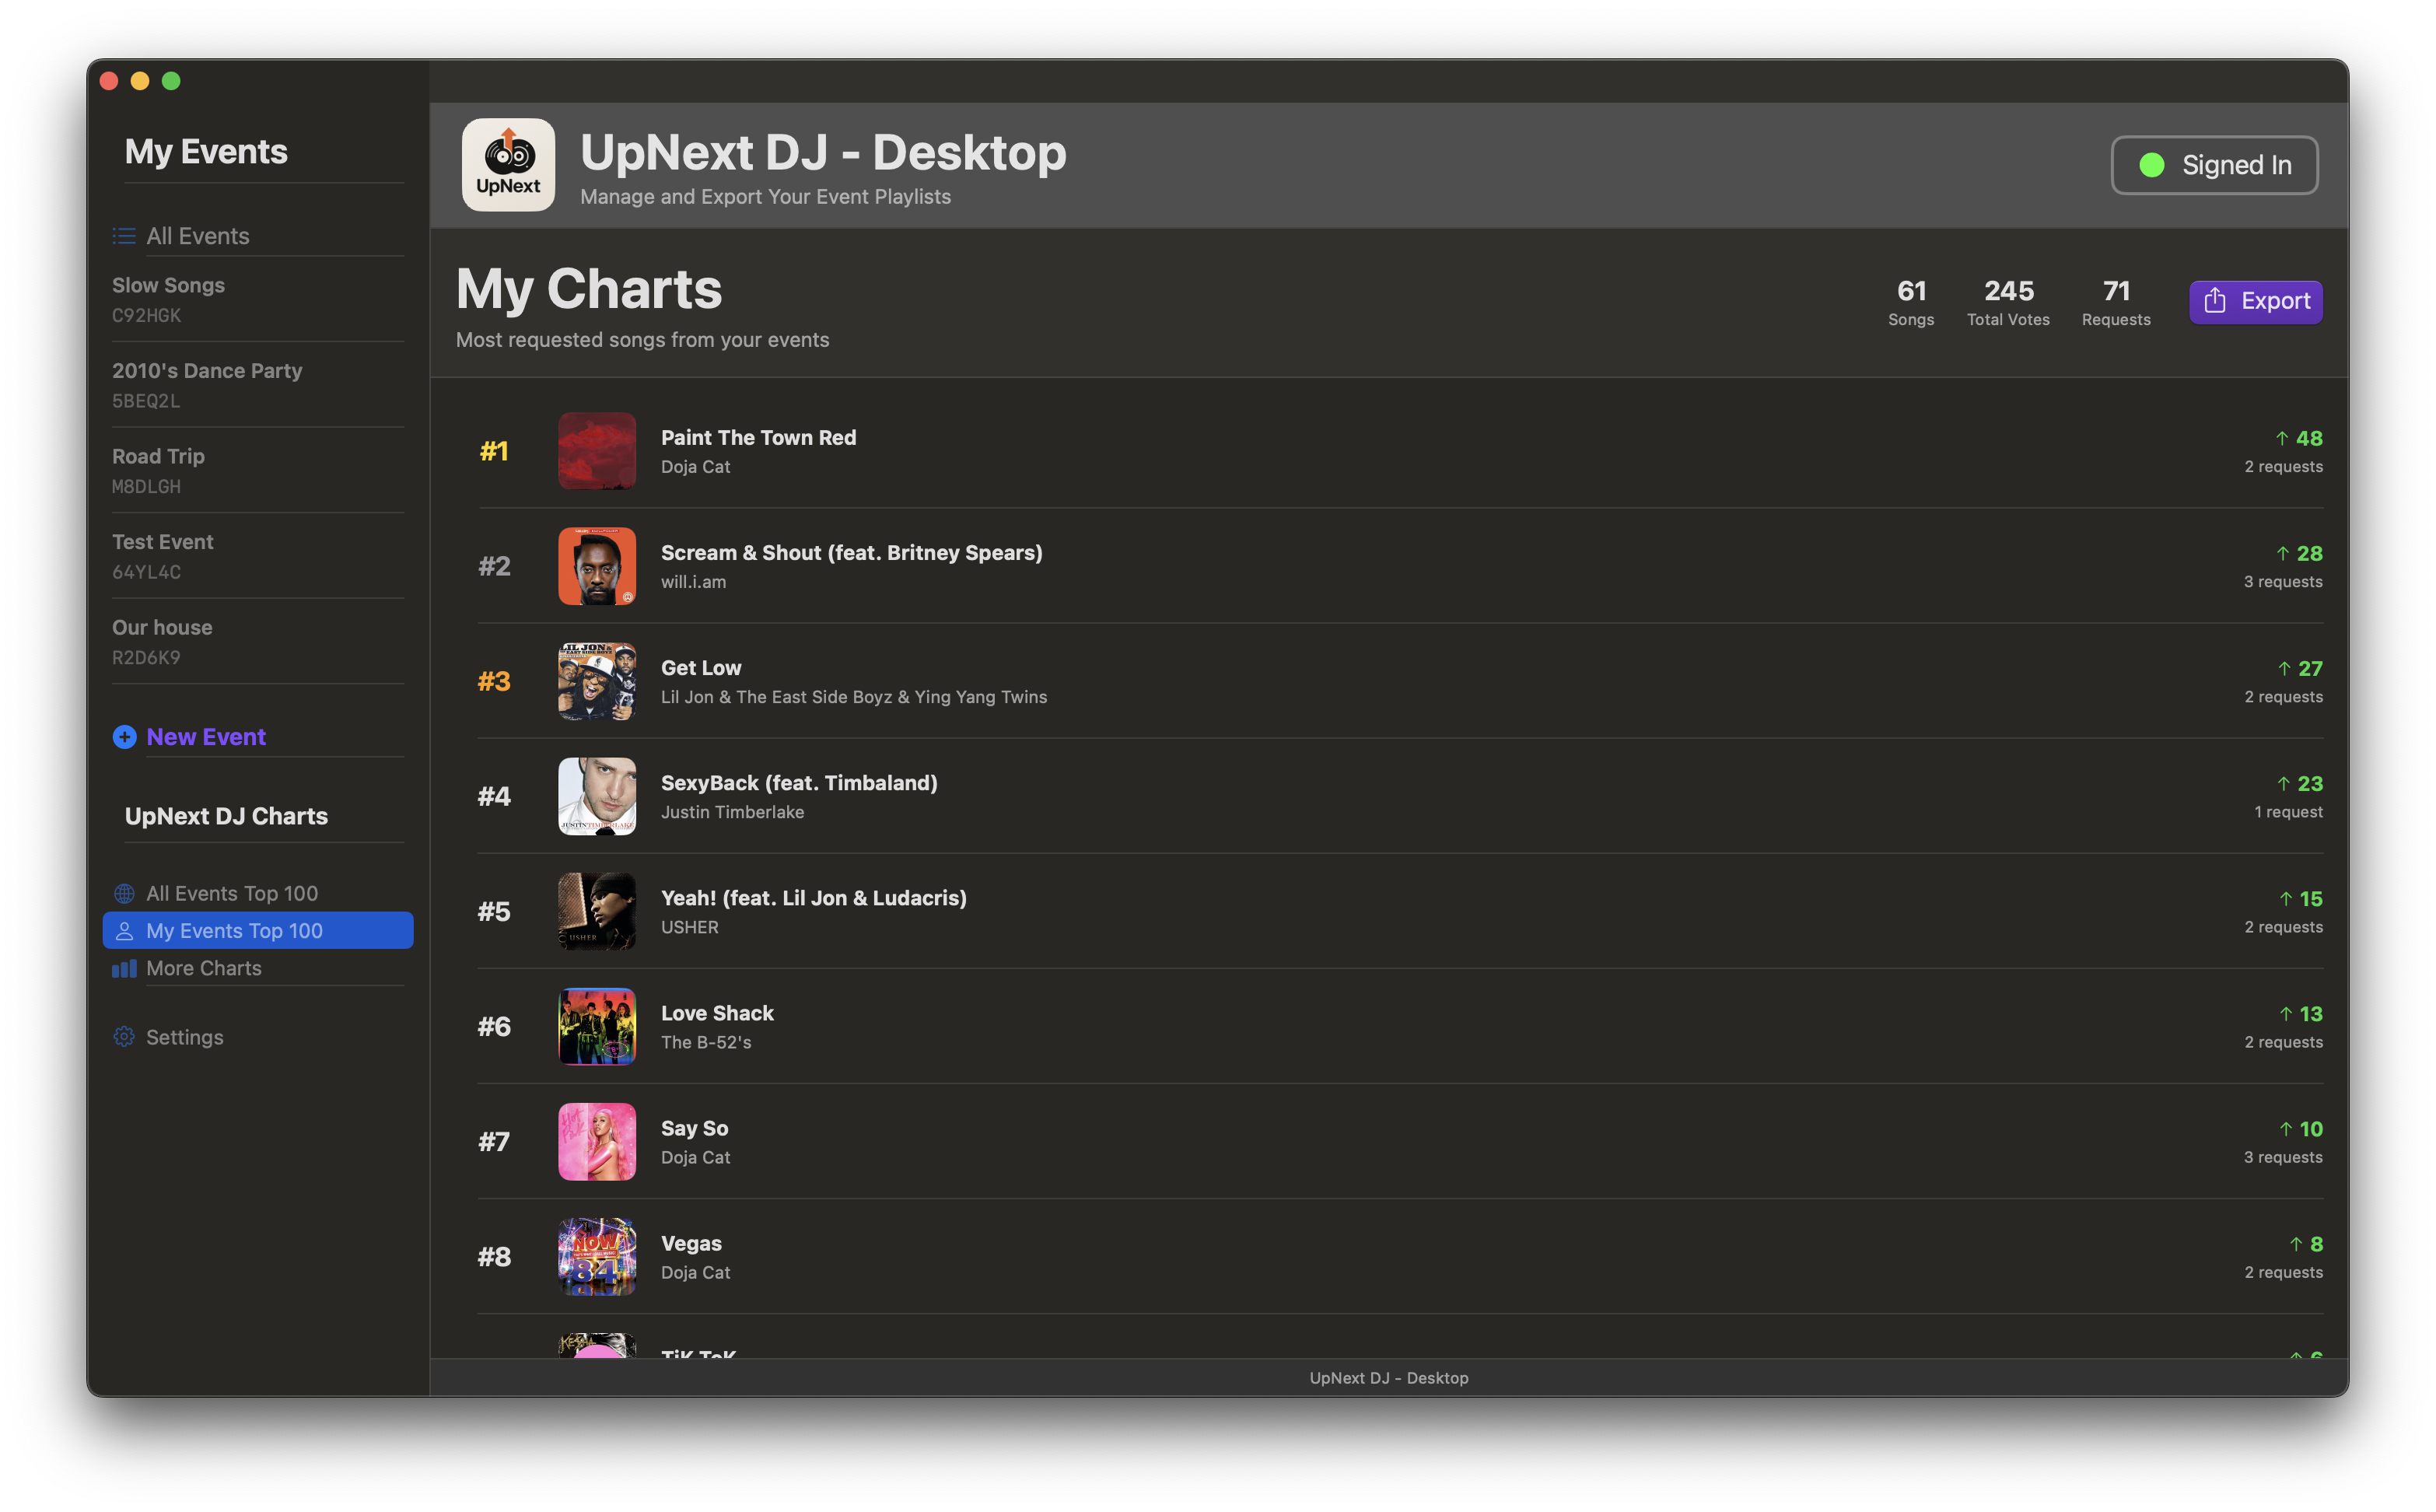
Charts show:
You can export any chart to CSV or M3U8 format to use as a starting playlist for your next event!
Check the global Top 100 before your gig to see what's trending. Pre-load those songs and you'll be ready for popular requests!
View the most requested songs filtered by event type - perfect for building genre-specific setlists!
Each event type has two chart views:
Before a wedding gig, check the "Weddings - Global Top 100" chart to see what's trending at weddings worldwide. Export it and you'll have a solid foundation playlist ready to go!
Tag your events correctly when creating them! The event type tag determines which charts your requests contribute to. This helps build better data for everyone in the UpNext DJ community.
Perfect for weddings, corporate events, and family-friendly gigs. Automatically filters explicit content.
Clean-only mode depends on accurate metadata. Make sure your music files are properly tagged with explicit/clean markers!
The easiest way for guests to join your event. They scan, they're in!
Every event also has a unique 6-letter code (like "A2K7H3"). Guests can manually enter this code if they can't scan the QR.
Send your event code or QR code to guests before the event starts (e.g., on invitations or social media). This encourages them to build the playlist ahead of time, giving you valuable insight into the crowd's musical tastes before you even arrive!